修复 Vercel/Github Actions 部署 hexo 导致文章的更新时间错误

在使用 VercelGithub Actions 自动化部署 hexo 博客时会发现所有文章的更新时间都变成了此次提交修改的时间,但实际上这些文章是没有任何修改的。

这是因为 git 在推送更新的时候不会保存文件的访问时间、修改时间等元信息。

Git SCM Wiki 中的解释

Why isn't Git preserving modification time on files?

Modification time on files is a feature that affects build tools. Most build tools compare the timestamp of the source(s) with the timestamp of the derived file(s). If the source is newer, then a rebuild takes place, otherwise nothing happens. This speeds up the build process a lot.

...

Git sets the current time as the timestamp on every file it modifies, but only those. The other files are left untouched, which means build tools will be able to depend on modification time and rebuild properly. If build rules change, that can cause a failure anyway, but that is a far less common problem than accidentally not rebuilding.

From: Why isn’t Git preserving modification time on files?

所以每次使用 git clone 下载的项目的文件元数据都是当前系统时间,而不是项目的创建时间。

Hexo 中的文章默认是通过使用 文件的最后修改时间 作为文章的更新时间,只有在 font-matter 中指定了 updated 才会使用 updated 的值作为文章的更新时间,所以才会出现 CI 构建后所有文章的更新时间都变成了此次构建的时间,因为推送上去的文件的元信息不会保存。

方法一:使用 updated 属性

在所有文章的 front-matter 中添加 updated: 更新时间

1
2
3
4
5
title: article title
date: 2023-01-01 00:00:00

# 添加 updated: 更新时间
updated: 2023-01-01 00:00:00

hexo.io - Font Matter

以后需要修改文件的更新时间时,只需要修改 updated 的值即可,但是这样做的话就需要手动维护所有文章的更新时间,不太方便。

使用 PowerShell 脚本自动更新所有文章的 updated 属性

@yiyun 的博客中,他使用了一个 PowerShell 脚本来自动更新所有文章的 updated 属性。

在 Hexo 博客根目录中创建 update.ps1 文件

update.ps1
1
2
3
4
5
6
7
8
9
10
11
12
13
14
15
16
17
18
19
20
21
22
23
24
25
26
27
28
29
30
31
32
33
34
35
36
37
38
39
40
41
42
43
44
45
46
47
48
49
50
51
52
53
54
55
56
57
58
59
60
61
62
63
64
65
66
67
68
69
70
71
72
73
74

$fileEncoding = "UTF8";

Function Convert-FromUnixDate ($UnixDate) {
[timezone]::CurrentTimeZone.ToLocalTime(([datetime]'1/1/1970').AddSeconds($UnixDate))
}

$fileNum = 0;
Get-ChildItem -Path "./source/_posts" -recurse *.md | ForEach-Object -Process{
$fileNum = $fileNum + 1;
if ($_ -is [System.IO.FileInfo]) {

$filePath = $_.FullName;
Write-Host('{0}. {1}' -f $fileNum, $filePath);

$lineNum = 0; # yaml 格式占据行数
$yamlStartEndNum = 0;
$existUpdated = $false;
$updatedNum = 0;
$newstreamreader = New-Object System.IO.StreamReader($filePath);
while (($readeachline = $newstreamreader.ReadLine()) -ne $null) {
$lineNum = $lineNum + 1;
$temp = $readeachline -replace " ","" -replace "\n",""
if ($temp -match "---") {
$yamlStartEndNum = $yamlStartEndNum + 1;
}
if ($readeachline.Contains("updated:")) {
$existUpdated = $true;
$updatedNum = $lineNum;
}
if ($yamlStartEndNum -ge 2) {
# yaml end
break;
}
}
$newstreamreader.Dispose();

$filedata = Get-Content -Path $filePath -Encoding $fileEncoding;
$oldYamlStr = $filedata | Select-Object -First $lineNum

# git log format: https://www.cnblogs.com/ckAng/p/11205055.html https://git-scm.com/docs/git-log
# 此文件 最后一次 commit 的 Unix时间戳
$dateUpdated = git log -1 --format='%ct' $filepath
$dateUpdated = Convert-FromUnixDate $dateUpdated
$dateUpdated = $dateUpdated.ToString("yyyy-MM-dd HH:mm:ss");
$newUpdated = "updated: " + $dateUpdated;

#Write-Host("newUpdated: " + $newUpdated)

$newYamlStr = ""
# 注意: yamlStr 是一个数组, 每一个元素为一行字符串
$tempOldYamlStr = $oldYamlStr;
if ($existUpdated) {
#Write-Host($yamlStr[$updatedNum-1])
$oldUpdated = $oldYamlStr[$updatedNum-1];
$tempOldYamlStr[$updatedNum-1] = $oldYamlStr[$updatedNum-1] -replace $oldUpdated,$newUpdated
}else {
# 修改 yaml 结束行
# TODO: 好像取到的这一行不包括 最后的换行符, 导致加一个 换行 反而多了, 不过为了保险, 还是加上一个换行
$tempOldYamlStr[$lineNum-1] = $newUpdated + $([System.Environment]::NewLine) + "---" + $([System.Environment]::NewLine)
}
$newYamlStr = $tempOldYamlStr

Write-Output $newYamlStr


$newFiledata = $newYamlStr + $filedata[$lineNum..$filedata.count]
$newFiledata | Set-Content -Path $filePath -Encoding $fileEncoding

}
}

#Write-Host("更新 updated 完成");

出处:yiyun’s Blog - 使用 PowerShell 一键更新 Hexo 文章的 updated

修改 font-matter 模板

默认的 font-matter 模板中不包括 updated 属性,所以需要修改模板使以后新建的文章也包含 updated 属性。

打开 Hexo 博客根目录下的 /scaffolds/post.md 文件,添加 updated 属性

1
2
3
4
5
6
7
8
title: {{ title }}
date: {{ date }}
# 添加 updated 属性
updated: {{ date }}
tags:
-
categories:
-

以后新建的文章就会自动包含 updated 属性了,其默认值为文章的创建时间。

方法二:修改 update_option

updated_option 控制了当 Front Matter 中没有指定 updated 时,updated 如何取值:

  • mtime: 使用文件的最后修改时间。这是从 Hexo 3.0.0 开始的默认行为。
  • date: 使用 date 作为 updated 的值。可被用于 Git 工作流之中,因为使用 Git 管理站点时,文件的最后修改日期常常会发生改变
  • empty: 直接删除 updated。使用这一选项可能会导致大部分主题和插件无法正常工作。

use_date_for_updated 选项已经被废弃,将会在下个重大版本发布时去除。请改为使用 updated_option: 'date'

From: hexo.io - 配置

在 Hexo 博客根目录下的 _config.yml 文件中修改 updated_option 的值为 date 即可。

1
2
# 文章的更新时间
updated_option: date

然而,这样做会导致所有文章默认的 updated 属性都变成了文章的创建时间,而不是修改时间,治标不治本。

方法三:使用 Github Action 部署到 Vercel

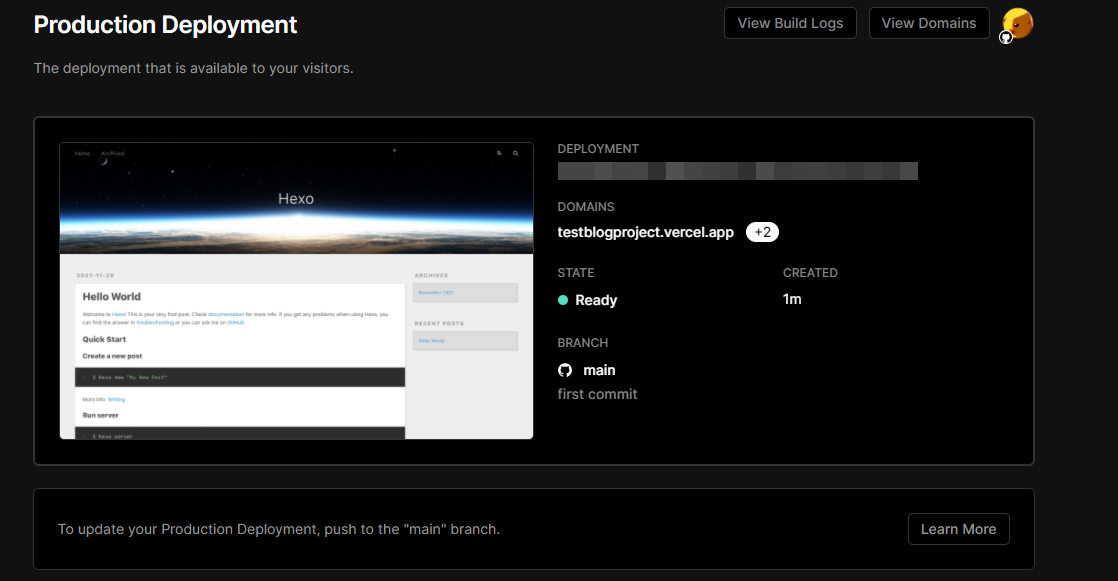
本站使用的就是这种方法,由于本站使用的是 Vercel 作为托管平台,每次推送到仓库后,Vercel 会自动构建并部署。

我们需要在 Vercel 构建之前使文件的最后修改时间与文章的更新时间一致,这样 Vercel 构建后的文件的最后修改时间才会与文章的更新时间一致。

因为 Vercel 绑定仓库后,每次推送会自动进行部署,不能修改 Vercel 的构建流程,所以我们需要在 Github 仓库中添加 Github Action。

原理

hexo-theme-next issue # 893 中提到了这个问题,@sli1989 提出了一个解决方案:

hi, the updated time with CI deployment can be fixed using this. please check Continuous Integration configurations carefully.

1
2
# Restore last modified time
- "git ls-files -z | while read -d '' path; do touch -d \"$(git log -1 --format=\"@%ct\" \"$path\")\" \"$path\"; done"

该条命令会将文件的最后修改时间修改为 Git 仓库中文件的最后提交时间,即文章的更新时间。

同样使用 find 命令也可以实现这个功能:

1
find source/_posts -name '*.md' | while read file; do touch -d "$(git log -1 --format="@%ct" "$file")" "$file"; done

准备工作

首先,将 Vercel 项目Github 仓库 的绑定关系解除,因为我们将要在 Github Action 中手动部署到 Vercel 中。

不想解除仓库绑定?查看关闭自动部署教程

Git Configuration | Vercel Docs 中提到:

git.deploymentEnabled

Type: Object of key branch identifier String and value Boolean, or Boolean.

Specify the branches that will not trigger an auto-deployment when committing to them. Any non specified branch is true by default.

Property’s default value is true. In case you want to turn auto-deployments off for every branch, property value must be set to false.

1
2
3
4
5
6
7
8
{
"git": {
"deploymentEnabled": {
"main": false
}
}
}

所以我们可以在博客根目录中创建一个 vercel.json 文件,添加以下内容:

1
2
3
4
5
6
7
8
{
"git": {
"deploymentEnabled": {
"main": false
}
}
}

这样 Vercel 就不会在 Github 仓库更新时自动部署了。

在 Github Action 中需要使用以下两个环境变量、一个秘钥:

  • VERCEL_ORG_ID

  • VERCEL_PROJECT_ID

  • VERCEL_TOKEN

获取 Vercel Access Token

我们需要在 Vercel 中获取一段 Vercel Access Token 用于 Github Action 部署到 Vercel。快速前往 Access Token 页面

获取 VERCEL_ORG_ID 和 VERCEL_PROJECT_ID

在本地安装 Vercel CLI 后,使用 vercel login 登录 Vercel

1
2
3
4
5
# npm
npm i -g vercel

# yarn
yarn global add vercel

在博客根目录下执行 vercel link,创建一个 Vercel 项目,此操作会在博客根目录下生成一个 .vercel 文件夹,.vercel/project.json 里面包含了 VERCEL_ORG_IDVERCEL_PROJECT_ID

在 Github 仓库中添加 secrets

在 Github 仓库中的 Settings -> Secrets and Variables -> Actions 中添加以下秘钥和环境变量:

  • VERCEL_TOKEN

  • VERCEL_ORG_ID

  • VERCEL_PROJECT_ID

创建 Github Action

在 Github 仓库中创建一个名为 .github/workflows/deploy.yml 的文件,添加以下内容:

1
2
3
4
5
6
7
8
9
10
11
12
13
14
15
16
17
18
19
20
21
22
23
24
25
26
27
28
name: Deploy Blog to Vercel Production Deployment
env:
VERCEL_ORG_ID: ${{ secrets.VERCEL_ORG_ID }}
VERCEL_PROJECT_ID: ${{ secrets.VERCEL_PROJECT_ID }}
on:
push:
branches:
- main
jobs:
build-and-deploy:
runs-on: ubuntu-latest
steps:
- uses: actions/checkout@v2
with:
persist-credentials: false
# 0 indicates all history for all branches and tags.
fetch-depth: 0
- name: Restore file modification time 🕒
run: find source/_posts -name '*.md' | while read file; do touch -d "$(git log -1 --format="@%ct" "$file")" "$file"; done
# run: "git ls-files -z | while read -d '' path; do touch -d \"$(git log -1 --format=\"@%ct\" \"$path\")\" \"$path\"; done"
- name: Install Vercel-cli🔧
run: npm install --global vercel@latest
- name: Pull Vercel Environment Information
run: vercel pull --yes --environment=production --token=${{ secrets.VERCEL_TOKEN }}
- name: Build Project Artifacts
run: vercel build --prod --token=${{ secrets.VERCEL_TOKEN }}
- name: Deploy Project Artifacts to Vercel
run: vercel deploy --prebuilt --prod --token=${{ secrets.VERCEL_TOKEN }}

注意

如果 github actions 中使用 actions/checkout@v2,请设定它的参数 fetch-depth: 0,因为 0 表示获取所有分支和标签的所有历史记录。默认值为 1

推送代码到 Github

在本地执行 git push 推送代码到 Github,Github Action 会自动部署到 Vercel。

方法三(Github Page版):使用 Github Action 部署到 Github Page

如果你的博客源文件托管在 Github 上,且使用 Github Action 部署到 Github Page,那么可以在你的部署 Action 中添加以下代码:

1
2
- name: Restore file modification time 🕒
run: find source/_posts -name '*.md' | while read file; do touch -d "$(git log -1 --format="@%ct" "$file")" "$file"; done

其余步骤与 方法三 -> 创建 Github Action 中一致,只是部署方式不同。

例子

以下是一个完整的 Github Action 部署到 gh-pages 分支的例子:

1
2
3
4
5
6
7
8
9
10
11
12
13
14
15
16
17
18
19
20
21
22
23
24
25
26
27
28
29
name: deploy blog to github
on:
push:
branches:
- main

jobs:
build-and-deploy:
runs-on: ubuntu-latest
steps:
- name: Checkout 🛎️
uses: actions/checkout@v2
with:
persist-credentials: false
# 0 indicates all history for all branches and tags.
fetch-depth: 0
- name: Restore file modification time
run: find source -name '*.md' | while read file; do touch -d "$(git log -1 --format="@%ct" "$file")" "$file"; done
- name: Install and Build 🔧
run: |
npm install
npm run build
- name: Deploy 🚀
uses: JamesIves/github-pages-deploy-action@3.7.1
with:
ACCESS_TOKEN: ${{ secrets.DEPLOY_TOKEN }}
BRANCH: gh-pages # The branch the action should deploy to.
FOLDER: public # The folder the action should deploy.
CLEAN: true # Automatically remove deleted files from the deploy branch

不要忘了在 secrets 中添加 DEPLOY_TOKEN 秘钥

参考链接

除了文中直接引用的链接出处,还有以下作为参考:

使用 GitHub Actions and Releases 将您的站点部署到 Vercel

修复 CI 构建博客造成的更新时间错误

How can I use GitHub Actions with Vercel? - Vercel Docs

examples/production.yaml at main - vercel/examples

头图/封面素材更改于 Ray Hennessy on Unsplash