皮丘Bot - 基于 Pichubot 开发的定制化QQ机器人

前言

这是基于 Pichubot 开发的QQ机器人,名为皮丘Bot。

文档地址:Pichubot - 皮丘Bot

功能:青年大学习管理系统

这个功能共有三个模块,分别为:

  • 网页面板

  • QQ群管理

  • 网络API

网页面板

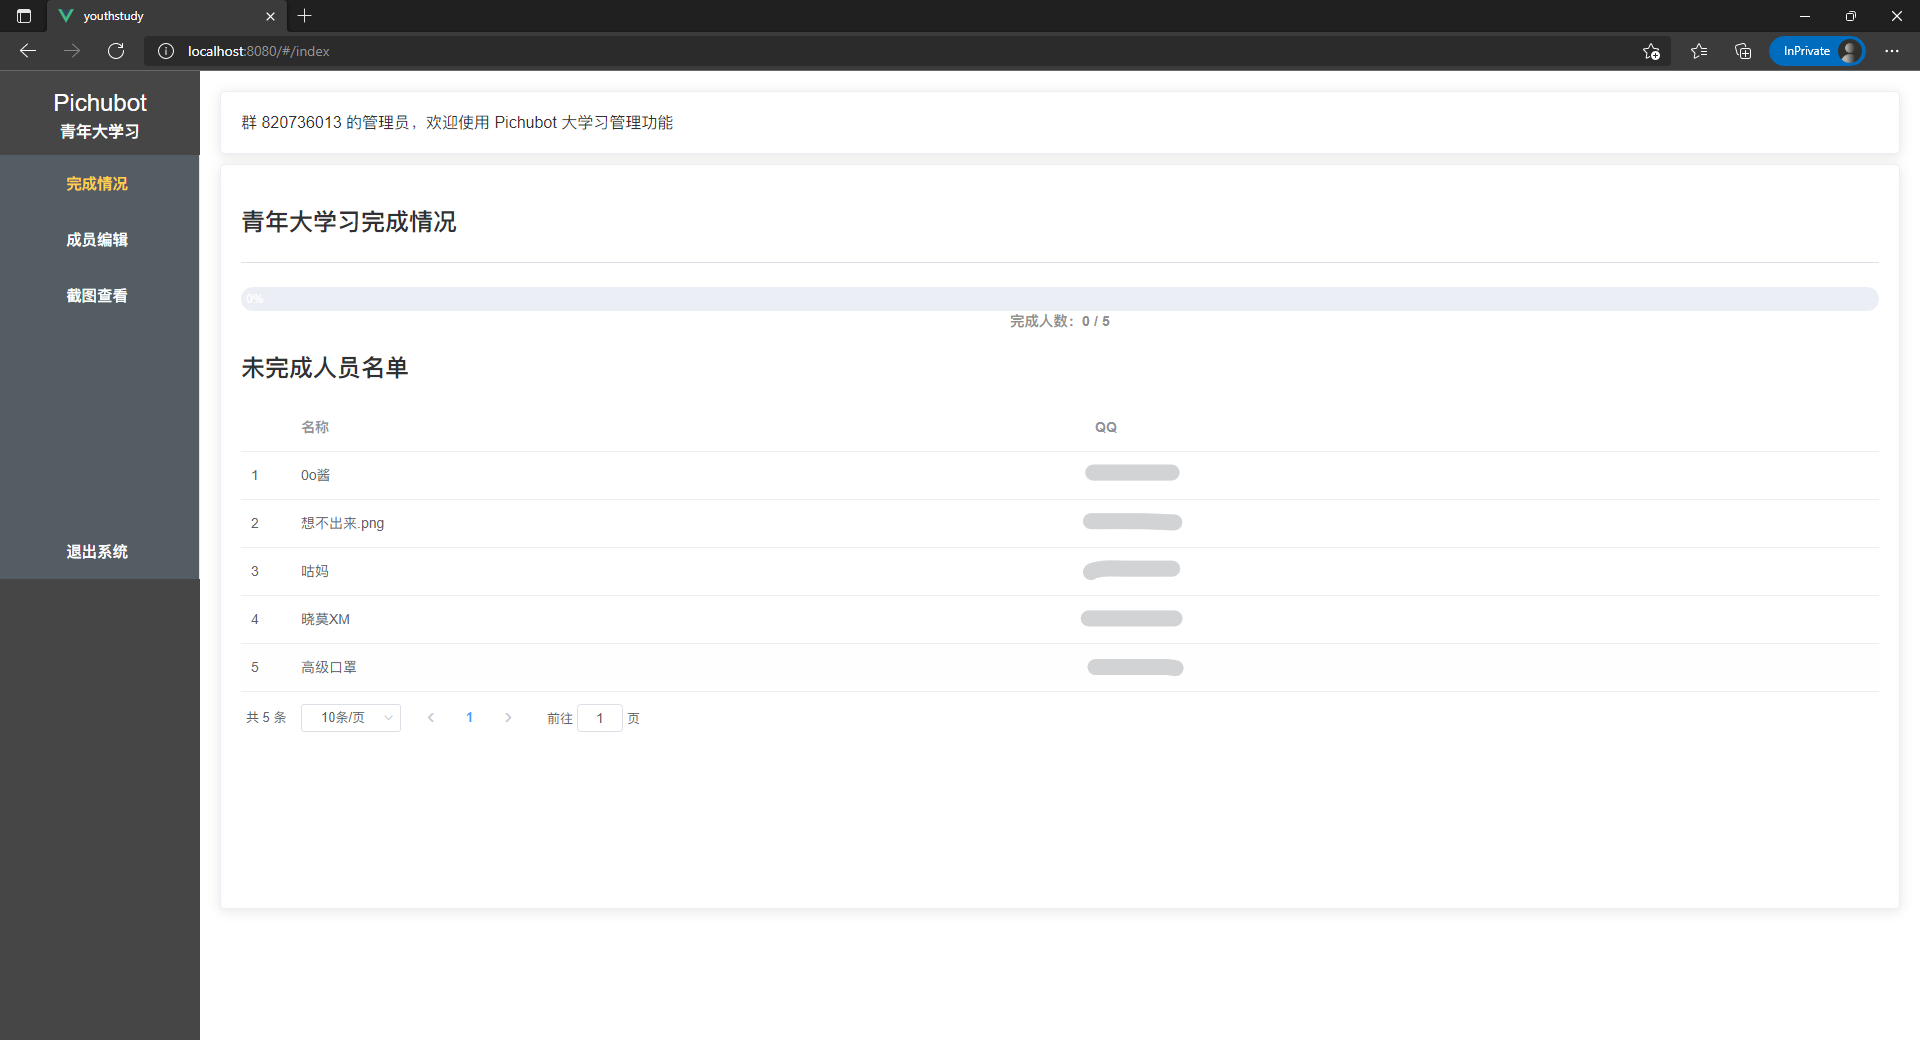
在这个模块中,皮丘Bot会提供一个简单的网页面板,用于管理青年大学习系统。

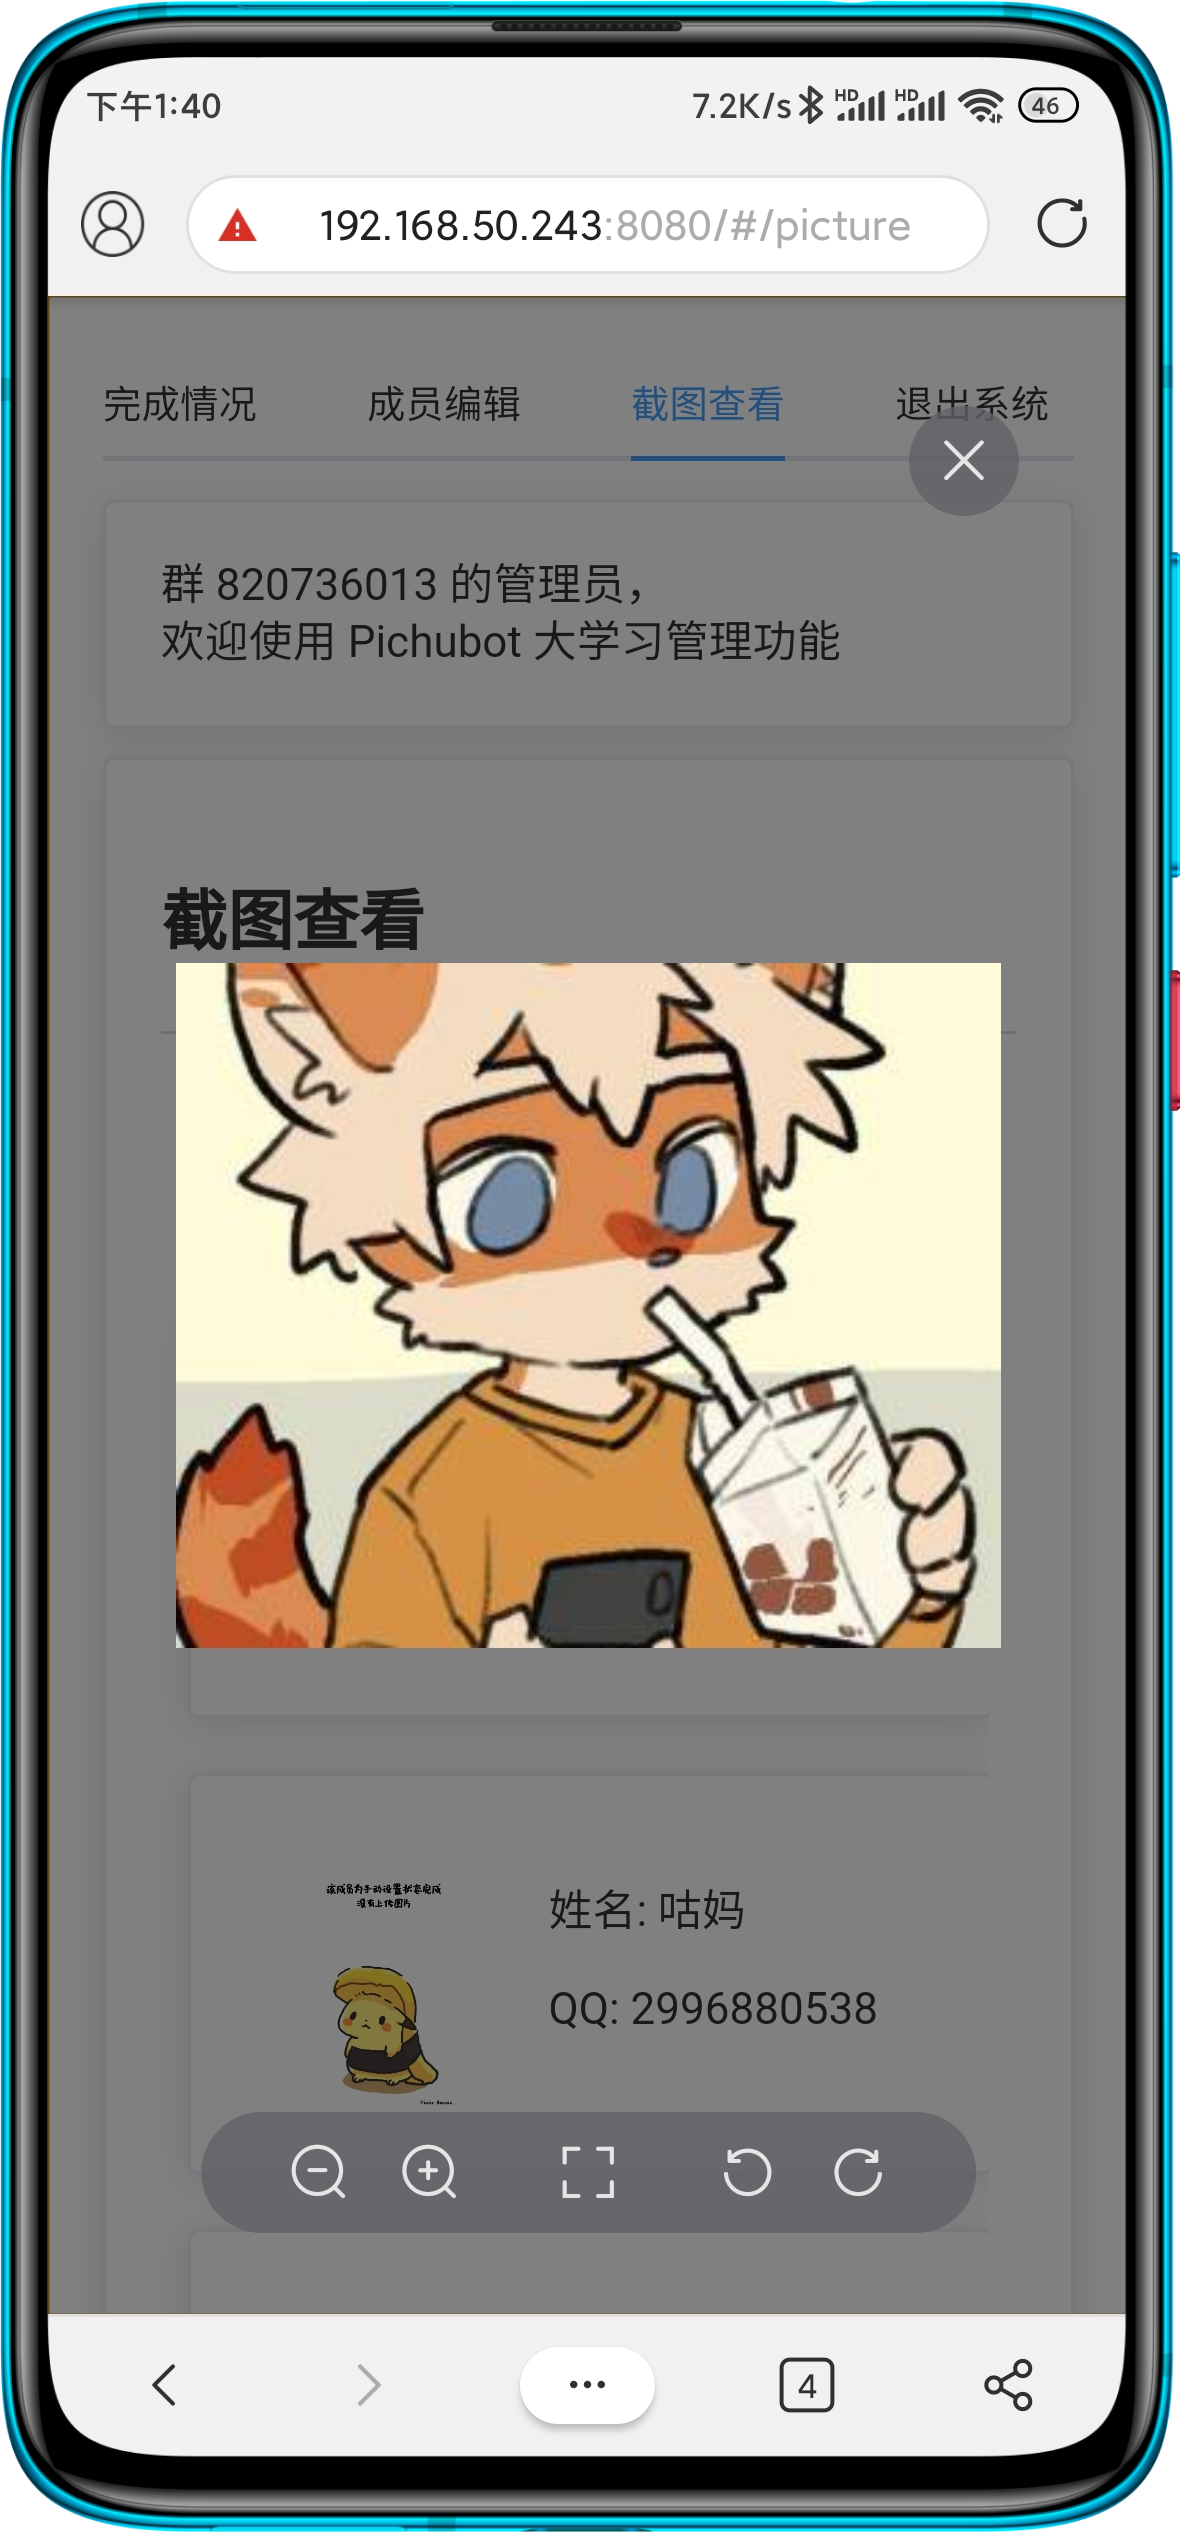
该模块有响应式布局,对手机端适配。

QQ群管理

image-20211126172117257

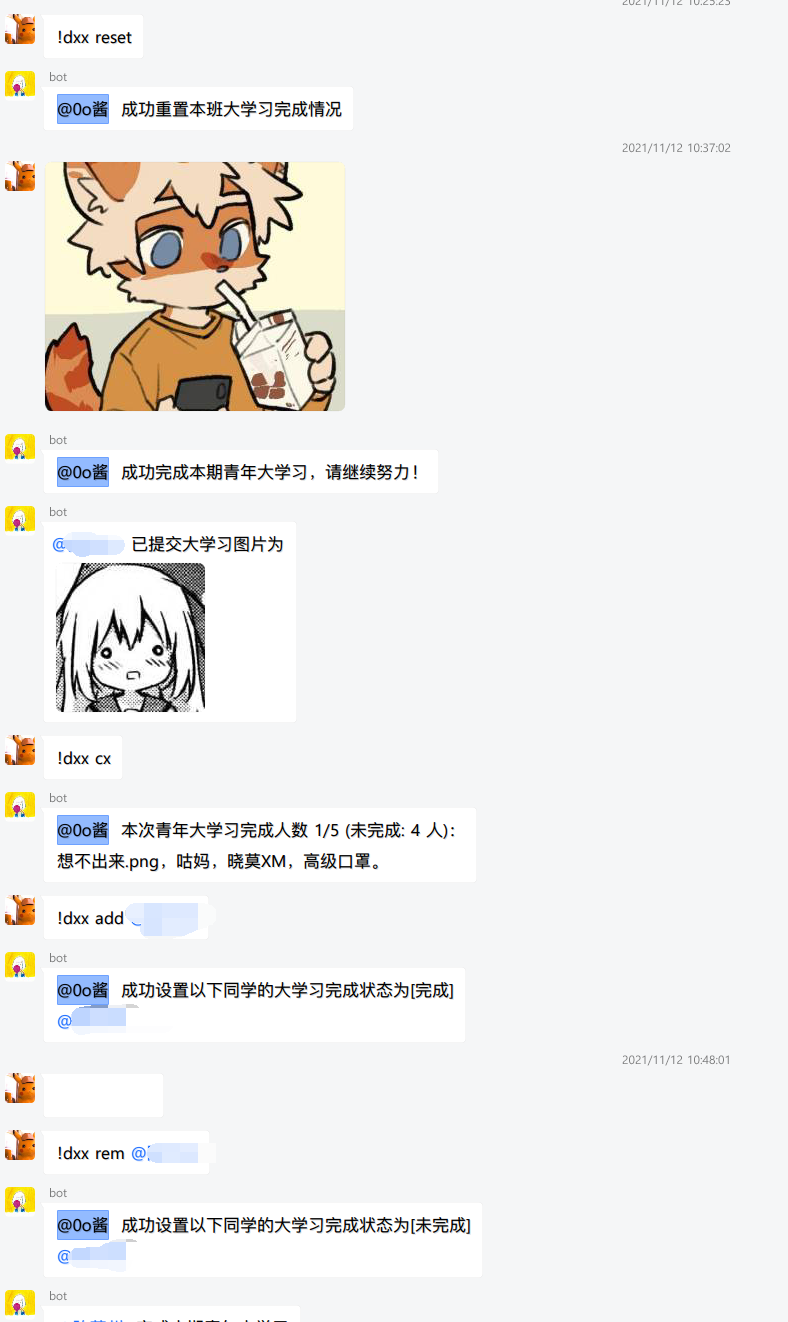
在这个模块中,皮丘Bot会接收到群消息,并将消息解析处理,这个功能是皮丘Bot的核心功能。

网络API

网页面板采用的是前后端分离的模式,这个模块是用于提供网络API的。

踩过的坑/笔记

前端(Vue.js + Axios + elementui)

前端面板采用的是 vue2 + axios + element-ui 进行开发,在开发过程中遇到了一些问题,比如:

在外部页面需要刷新内部组件的数据

此处我将“成员列表”,写作一个组件,在“成员管理”页面中使用到了这个组件,但是在外部无法直接调用组件内的函数,也就无法做到重新加载列表内的表格。

解决方法

在使用组件的时候给组件加上ref标签,通过调用this.$refs.内容.函数即可调用组件内的函数。

源码:
<template>
    ...
    <memberTable ref="memberTable" />
    ...
</template>

<script>
    import memberTable from '@/components/membertable.vue'
    ...
    export default {
    	...
    	this.$refs.memberTable.getMemberList()
        ...
    }
</script>

axios 初始化拦截器

由于 API 每次请求都需要 Bearer Token 以及配置请求地址,于是我在 src/ 目录下新建了一个 axios-init.js 文件用于初始化 axios 并输出。

以下为文件源码

src/axios-init.js

import axios from 'axios'
import router from '@/router'  //引入router
import cookies from 'vue-cookies'
import { Notification } from 'element-ui';

let instance = axios.create(); //创建Loading 的实例
instance.defaults.baseURL = "http://localhost/api/"; // 配置axios请求的地址
instance.defaults.headers.post['Content-Type'] = 'application/json; charset=utf-8';
axios.defaults.crossDomain = true;
axios.defaults.withCredentials = true;  //设置cross跨域 并设置访问权限 允许跨域携带cookie信息
instance.defaults.headers.common['Authorization'] = ''; // 设置请求头为 Authorization

// 请求拦截器
instance.interceptors.request.use(
  config => {
    // 每次发送请求之前判断vuex中是否存在token
    const token = cookies.get('token');
    token && (config.headers.Authorization = 'Bearer '+ token);
    return config;
  },
  error => {
    return Promise.error(error); // 抛出错误
  }
);

instance.interceptors.response.use(
  response => {
    // 如果返回的状态码为200,说明接口请求成功,可以正常拿到数据
    // 否则的话抛出错误
    // 如果返回的状态码和body中的code不一致,说明接口请求失败,抛出错误
    if (response.status === 200 && response.data.code !== 200) {
      switch (response.data.code) {
        case 1001:
          cookies.remove('token');
          cookies.remove('userId');
          cookies.remove('userName');
          router.push({path: '/login'});
          Notification({
            title: '登录超时',
            message: '请尝试重新登录',
            type: 'warning'
          });
          break;
        default:
          Notification({
            title: '提示',
            message: response.data.message,
            type: 'error'
          });
      }
      return Promise.reject(response);
    } else if (response.status === 200 && response.data.code === 200) {
      return Promise.resolve(response);
    }
  },
  error => {
    // 如果请求失败,返回错误
    return Promise.reject(error);
  }
);

export default instance

src/main.js(引入 axios-init 中导出的 instance)

import instance from "./axios-init";
Vue.prototype.$http = instance;

响应式布局

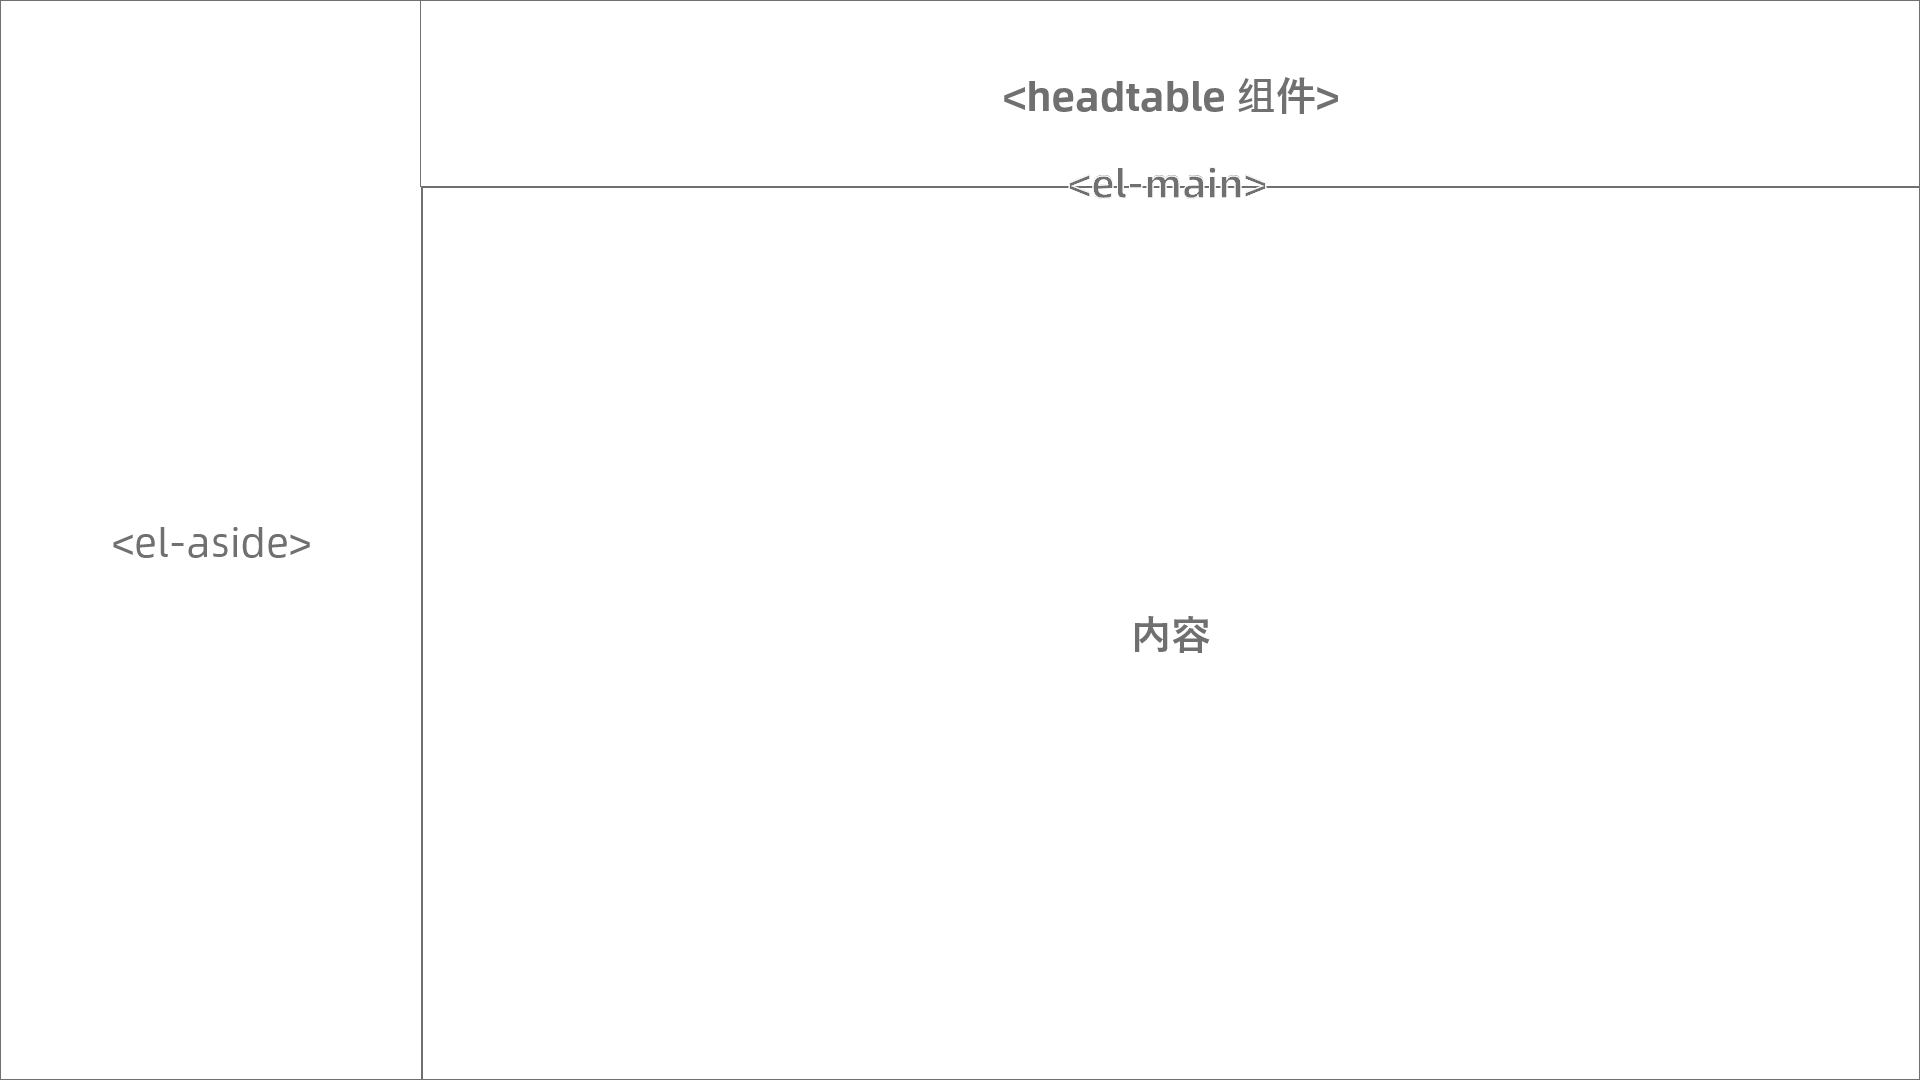
下图为网页结构

image-20211129100954349

响应式布局仅需设置 el-aside 与 headtable 的 display 属性即可。

@media screen and (max-width: 768px) {
  .asidemenu {
    display: none;
  }
  .headmenu {
    display: visible;
  }
}

@media screen and (min-width: 768px) {
  .asidemenu {
    display: visible;
  }
  .headmenu {
    display: none;
  }
}
后端(API、数据库操作部分)

检测 Bearer token

新建函数 verifyToken,传入 Header 中的 Authorization。

使用 strings.HasPrefix() 判断是否含有 token,将 token 与已有的 token 进行比对验证,通过后返回 true.

func verifyToken(qq string, token string) bool {
	if strings.HasPrefix(token, "Bearer") {
		if _, ok := Cookies[qq]; ok && Cookies[qq] == token[7:] {
			return true
		}
	}
	return false
}

Golang 实现 16/32 位 MD5 加密

package main

import (
	"crypto/md5"
	"encoding/hex"
	"fmt"
)

//返回一个32位md5加密后的字符串
func GetMD5Encode(data string) string {
	h := md5.New()
	h.Write([]byte(data))
	return hex.EncodeToString(h.Sum(nil))
}

//返回一个16位md5加密后的字符串
func Get16MD5Encode(data string) string{
	return GetMD5Encode(data)[8:24]
}

func main() {
	source:="hello"
	fmt.Println(GetMD5Encode(source))
	fmt.Println(Get16MD5Encode(source))
}

Golang http 包下 FileServer 的使用

// 将本地 "/doc" 路径下的文件绑定至 "www.xxx.com/" 下
http.Handle("/", http.FileServer(http.Dir("./doc")))

// 将本地 "/doc" 路径下的文件绑定至 "www.xxx.com/abc/" 下
http.Handle("/abc/", http.StripPrefix("/abc", http.FileServer(http.Dir("./doc"))))

Golang CORS 跨域请求

在 http.ResponseWriter 中允许所有类型的请求,头,域名

writer.Header().Set("Access-Control-Allow-Origin", "*") //允许访问所有域
writer.Header().Set("Access-Control-Allow-Methods", "*")
writer.Header().Set("Access-Control-Allow-Headers", "*")

Golang 打包文件夹为 zip 压缩文件

打包函数:

func Zip(src_dir string, zip_file_name string) error {

	dir, err := ioutil.ReadDir(src_dir)
	if err != nil {
		logger.Log.Error("ioutil.ReadDir err:" + err.Error())
		return err
	}
	if len(dir) == 0 {
		logger.Log.Info(src_dir + " is empty dir!")
		return nil
	}
	// 预防:旧文件无法覆盖
	os.RemoveAll(zip_file_name)

	// 创建:zip文件
	zipfile, _ := os.Create(zip_file_name)
	defer zipfile.Close()

	// 打开:zip文件
	archive := zip.NewWriter(zipfile)
	defer archive.Close()

	// 遍历路径信息
	filepath.Walk(src_dir, func(path string, info os.FileInfo, _ error) error {

		// 如果是源路径,提前进行下一个遍历
		if path == src_dir {
			return nil
		}

		// 获取:文件头信息
		header, _ := zip.FileInfoHeader(info)

		header.Name = strings.TrimPrefix(path, src_dir+`\`)

		// 判断:文件是不是文件夹
		if info.IsDir() {
			header.Name += `/`
		} else {
			// 设置:zip的文件压缩算法
			header.Method = zip.Deflate
		}

		// 创建:压缩包头部信息
		writer, _ := archive.CreateHeader(header)
		if !info.IsDir() {
			file, _ := os.Open(path)
			defer file.Close()
			io.Copy(writer, file)
		}

		return nil
	})
	return nil
}

需要注意的是:在传入字符串时的路径最好使用 filepath.Join 进行操作,直接使用字符串可能会造成打包错误的问题, zipfile 需要加上扩展名

Golang GORM 根据结构体结构建指定名字的表

// 结构体
type user struct {
	QQ   int64  `json:"qq"`
	Name string `json:"name"`
	Comp int    `json:"comptype"`
	Url  string `json:"url,omitempty"`
}

// gorm 新建一个user结构的表
// database 为 *gorm.DB 类型
func createTable(groupId string) error {
	err := database.Table(groupId).Migrator().CreateTable(&user{})
	return err
}

VuePress 文档

部署文档后样式丢失

docs/.vuepress/config.js 中的 base 字段由绝对地址 / 改为相对地址 ./ 即可

在 VuePress 中使用 element-ui

docs/.vuepress/ 目录下新建文件 enhanceApp.js

import Vue from 'vue';
import VueRouter from 'vue-router';
import Element from 'element-ui';
import 'element-ui/lib/theme-chalk/index.css'
// import ViewUI from 'view-design';
// import 'view-design/dist/styles/iview.css';
Vue.use(VueRouter);
Vue.use(Element);

使用包管理安装对应的包(vue,element-ui)即可。

让 Vuepress 支持图片放大功能

使用包管理安装插件 @vuepress/plugin-medium-zoom

yarn add -D @vuepress/plugin-medium-zoom
# OR npm install -D @vuepress/plugin-medium-zoom

docs/.vuepress/config.js 中添加

module.exports = {
  plugins: ["@vuepress/medium-zoom"]
}

评论

评论加载中…

输入关键词开始搜索。

选择Enter 打开Esc 关闭CtrlK 唤起